


Analysis of the Foaming Process for Special EVA Tool Bags
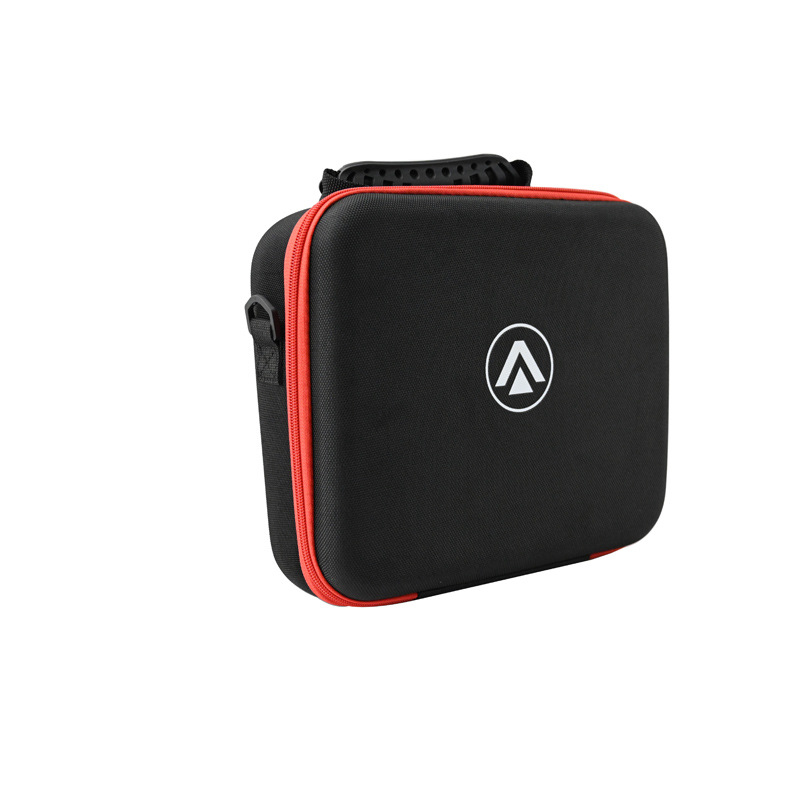
In the field of industrial packaging and tool storage, EVA tool bags, with their core advantages of lightweight, impact resistance, and strong customization, are an ideal protective option for precision instruments, electronic equipment, mechanical parts, and other products. These properties are achieved through the sophisticated foaming process. This article will delve into the core principles of EVA foaming, the main process paths, key quality control nodes, and the decisive impact of different processes on tool bag performance, providing professional reference for practitioners and purchasers.
I. Basic Understanding of EVA Foaming: Raw Materials and Principles
EVA (ethylene-vinyl acetate copolymer) is a linear polymer material with a hard texture and lacks elasticity, making it unsuitable for direct use in tool bag cushioning and protection. The core purpose of the foaming process is to create a large number of uniform micropores within the EVA matrix through physical or chemical means, thereby modifying its physical properties. This process is like “infusing” EVA with life, transforming it from a rigid material into a functional material that combines cushioning, flexibility, and lightweight properties.
(I) Core Raw Material Composition
EVA foaming is not the result of a single raw material, but rather a synergistic system of “base resin + functional additives.” The ratio of each component directly determines the final product’s performance:
EVA resin: As the base material, its vinyl acetate (VA) content is a key indicator. Tool kits typically use resins with a VA content of 15%-30%. A higher VA content increases the material’s flexibility and adhesion, but also reduces its compression set resistance. A lower VA content results in higher hardness and better support, but also increased brittleness. This requires flexible adjustment depending on whether the tool kit will carry heavy accessories.
Foaming agent: The “source” of micropore formation, divided into chemical and physical foaming agents. Chemical foaming agents, such as azodicarbonamide (AC foaming agent), are primarily used in the tool kit process. Their decomposition temperature (approximately 160-200°C) must match the EVA melting temperature to ensure precise gas release after the resin melts to form micropores. Cross-linking agents: These maintain the microporous structure, often using dicumyl peroxide (DCP). At high temperatures, they form a three-dimensional network of EVA molecules, preventing micropore collapse during foaming and ensuring the toolkit’s shape stability over long-term use.
Auxiliary additives: These include plasticizers (to enhance flexibility), antioxidants (to slow aging), and masterbatches (to customize the appearance). For specialized toolkit needs, functional ingredients such as flame retardants (for electronic toolkits) and antistatic agents (for precision instrument toolkits) can also be added. (II) Core Principles of Foaming
EVA foaming is essentially a four-step reaction process: melting – cross-linking – foaming – setting. First, the EVA resin and various additives are thoroughly mixed in a mixer to form a uniform premix. The premix then enters the foaming mold, where it melts at high temperatures (170-220°C). Simultaneously, the cross-linking agent triggers molecular cross-linking to form a network structure. When the temperature reaches the foaming agent’s decomposition threshold, a large amount of gas (nitrogen, carbon dioxide, etc.) is released, forming countless tiny bubbles within the cross-linked network. Finally, the bubbles are fixed in the substrate by cooling and setting, forming the porous EVA foam material.
II. Detailed Explanation of Mainstream Foaming Processes for EVA Specialty Tool Kits
Different foaming processes determine key parameters of the EVA material, such as microporous structure, density, and hardness, thereby adapting it to the tool kit requirements of different scenarios. Currently, the three most widely used processes in the industry are compression foaming, injection molding, and continuous foaming.
(I) Compression Foaming: The Preferred Process for Customized Tool Kits
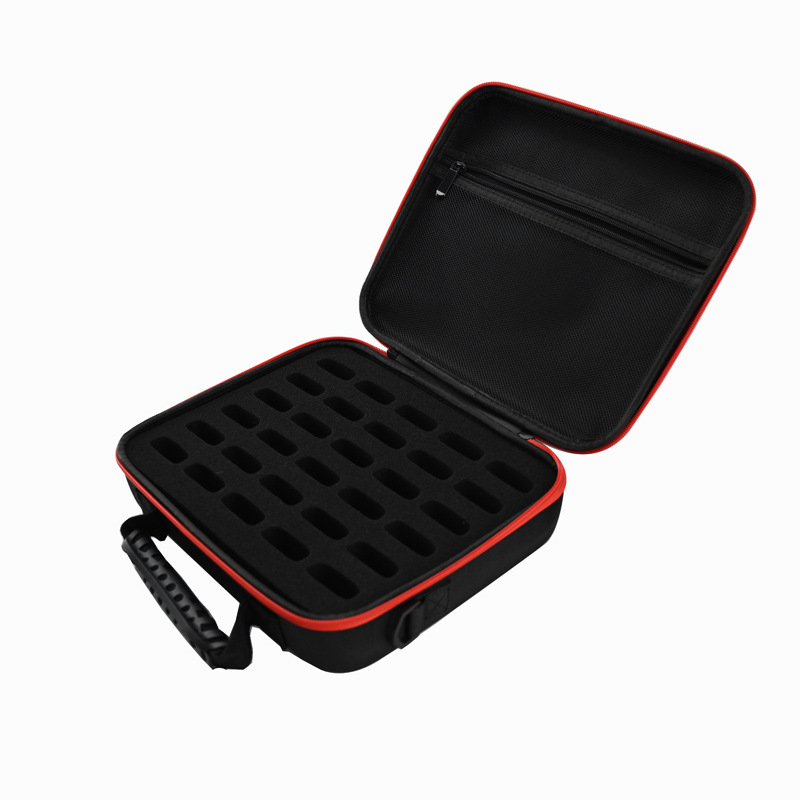
Compression foaming is the most popular production method for EVA specialty tool kits, particularly suitable for customized products with grooves, partitions, and special-shaped structures, such as precision instrument tool kits and medical device storage bags.
Process Flow
Premix Preparation: EVA resin, foaming agent, crosslinker, and additives are mixed in an internal mixer according to the formulated ratio. Mix at 80-100°C for 10-15 minutes to ensure uniform dispersion. The preform is then pressed into a sheet or block preform of uniform thickness.
Mold Design and Preheating: Customize the metal mold based on the tool kit’s three-dimensional structure (such as accessory slot depth, corner curvature, and surface texture). Allow a 10%-30% foaming margin (adjusted based on density requirements) and preheat to 120-150°C to prevent uneven foaming. Compression Molding: The preform is placed in a preheated mold. The mold is closed and a pressure of 10-20 MPa is applied. The temperature is simultaneously raised to 180-200°C and maintained at this temperature for 15-30 minutes to complete the crosslinking and foaming reaction.
Demolding and Post-Processing: After cooling to below 80°C, the preform is demolded to obtain a pre-foamed EVA blank. This is then trimmed, polished, and cut (if a layered structure is required). Some high-end products also require surface printing, flocking, or lamination.
Process Advantages and Limitations
Advantages: ① High degree of customization, allowing precise matching to tool shapes for “one-to-one” protection; ② Dense and uniform microporous structure with a wide controllable density range (200-800 kg/m³) and excellent cushioning performance; ③ Surface textures and logos can be integrated without secondary processing. Limitations: ① High mold costs make it unsuitable for small-batch trial production; ② Long production cycles (approximately 1-2 hours per batch), making it less efficient than continuous foaming; ③ Large tool kits are prone to under-foaming at the edges, requiring high mold venting design.
(II) Injection Molding: An Economical Choice for Efficient Mass Production
Injection molding, also known as “ejection foaming,” involves injecting molten EVA into a mold using an injection molding machine for rapid foaming. It is suitable for standardized, high-volume production of tool kits, such as general-purpose electrical tool kits and small repair tool storage boxes.
Process Flow
Material Plasticization: The premix enters the injection molding machine’s hopper and enters the screw. As the screw rotates, it is plasticized and melted in the heating section (150-200°C). Simultaneously, the screw compression generates pressure, pushing the material toward the nozzle. High-pressure injection: The molten material is rapidly injected into a closed mold cavity under high pressure (20-40 MPa). During this process, the mold temperature is lower than the material temperature (typically 80-120°C). Upon contact with the mold wall, the material rapidly cools to form a surface layer, while the interior remains hot and foaming continues.
Pressure-holding and shaping: After injection, a certain pressure (5-15 MPa) is maintained to prevent internal bubbles from expanding and causing product deformation. The mold is opened and the part removed after the temperature drops below 60°C. Subsequent trimming requires only simple trimming.
Process Advantages and Limitations
Advantages: ① High production efficiency, with a single mold cycle time of 1-5 minutes, suitable for mass production of millions of units. ② High degree of automation, reducing manual intervention and ensuring consistent product quality. ③ High material utilization, with scrap material recyclable and reusable, reducing costs.
Limitations: ① Limited customization flexibility, making it difficult to produce complex, irregularly shaped structures (such as deep cavities and narrow slits). ② The surface layer has a higher density than the interior, resulting in slightly less uniform cushioning than compression foaming. ③ High material flowability is required; excessively high VA content can easily lead to injection defects. (III) Continuous Foaming: A Specialized Process for Ultra-Thin/Large-Area Tool Kits
Continuous foaming involves continuously extruding and foaming the EVA mixture through an extruder, forming an infinitely long foam sheet. This sheet is then cut and punched into tool kits. This process is primarily used for ultra-thin liners (thickness <5mm) and large-area flat tool mats.
Process Flow
Continuous Extrusion: The premix enters a twin-screw extruder, undergoes multi-stage heating (160-210°C) to plasticize it, and is then continuously extruded through a specialized foaming die. The foaming agent rapidly decomposes and foams at the die exit.
Traction and Shaping: The foamed sheet is cooled and shaped by cooling rollers while being pulled at a constant speed by a traction machine to control the expansion ratio (typically 3-10 times) to form a continuous sheet of uniform thickness.
Post-Processing: The sheet is cut to the tool kit size and then punched out with slots, holes, and other features. Alternatively, it can be composited with materials such as fabric and leather. Process Advantages and Limitations
Advantages: ① Capable of producing ultra-thin or ultra-wide sheets (up to 2 meters wide), meeting specialized size requirements; ② High production continuity, suitable for large-scale roll supply; ③ Extremely low cost, far exceeding other processes in terms of cost-performance.
Limitations: ① Single structure, unable to produce three-dimensional, irregularly shaped structures; ② Poor density uniformity, prone to pinholes and air bubbles on the surface; ③ Weak compression deformation resistance, unsuitable for tool kits subjected to long-term loads.
III. Precisely Matching Process Selection with Tool Kit Performance
The key to selecting a foaming process is to balance the three core elements of the tool kit: protection requirements, structural design, and mass production scale, to achieve the optimal balance between performance and cost. The following are process adaptation solutions for typical scenarios:
(I) Precision Instrument Tool Kits: Molded Foam is Preferred
Precision instruments (such as optical lenses and sensors) require core protection with “no blind spots and precise positioning.” The tool kits must have internal grooves that conform to the accessory’s shape, and the cushioning material density must reach 500-700 kg/m³ to withstand impact. Molded foam can achieve 0.1mm-level conformity between the slot and the accessory through custom molds, and its dense microporous structure effectively absorbs vibration, making it a perfect fit for these requirements. A resin with a VA content of 20%-25% and the addition of an antistatic agent is recommended to prevent static damage to precision components.
(II) General Electrical Tool Kits: Injection Foam is Preferred
General electrical tools (such as screwdrivers and pliers) are in high demand and have standardized structures. The tool kits require “wear resistance, durability, and cost control.” Injection foaming offers significant advantages in efficiency and cost. It enables the integrated molding of the tool kit housing and internal slots. The high-density surface layer improves wear resistance, and the short production cycle allows for rapid response to market demand. A resin with a VA content of 15%-20% is recommended, along with the addition of a toughening agent to enhance impact resistance. A density of 400-600 kg/m³ is sufficient to meet application requirements.
(III) Tool Mats for Large Equipment: Continuous Foaming
Tool mats for large machinery (such as machine tool placement mats) need to cover large areas and are typically 3-5 mm thick. Key requirements are “anti-slip” and lightweight. Continuous foaming can produce sheets up to 1.8 meters wide, ready for use after cutting. Its low density (200-300 kg/m³) reduces overall weight, and embossing can enhance anti-slip properties. This type of product requires minimal structural requirements, maximizing the cost advantages of continuous foaming.
IV. Key Quality Control Points in the Foaming Process
Even with the same process, inadequate quality control can lead to problems in EVA toolkits, such as uneven density, compression deformation, and aging cracking. The following four key points are key to quality control:
(I) Premix Uniformity Control
Uneven material mixing can directly lead to localized foaming anomalies. This uniformity is ensured through a two-stage mixing process: the first stage achieves initial fusion of the materials in an internal mixer, and the second stage is rolled into sheets on an open mixer. The sheets are inspected for uniform color and texture, and are considered acceptable if they are free of visible particles or streaks. The mixing temperature must also be strictly controlled. Excessively high temperatures can lead to premature decomposition of the foaming agent, while excessively low temperatures can result in incomplete mixing.
(II) Synergy between Foaming Temperature and Pressure
The matching of temperature and pressure determines microcellular quality. During compression foaming, if the temperature rises too quickly without sufficient pressure, the bubbles will be large and uneven. During injection foaming, if the mold temperature is too low, the surface layer will solidify quickly, preventing internal gas from escaping, resulting in “shrinkage” defects. It is recommended to use a “segmented temperature control + pressure feedback” system to monitor temperature and pressure changes within the mold in real time, ensuring that parameter fluctuations are controlled within the range of ±5°C and ±1 MPa.
(III) Balancing Crosslinking Degree and Expansion Ratio
Insufficient crosslinking can lead to microcellular collapse, while excessive crosslinking reduces the expansion ratio. This requires dual control through “crosslinker dosage + foaming time”: Calculate the expansion ratio based on the target density (expansion ratio = raw material density / finished product density). Adjust the crosslinker dosage based on the decomposition efficiency of the foaming agent. Generally, a 0.5% increase in crosslinker dosage increases the expansion ratio by 5%-10%. During production, the crosslinking degree of the finished product should be regularly tested (using the gel content method) to ensure it remains within the optimal range of 60%-80%. (IV) Post-Processing and Aging Test
After demolding, the EVA material still contains internal stress and requires “natural aging.” The blank is placed in an environment at 25°C and 50% humidity for 72 hours to release internal stress before processing, which reduces the risk of subsequent deformation. Durability must also be verified through aging testing. The finished product is aged in a 70°C oven for 7 days, or frozen at -30°C for 24 hours. The compression set (must be ≤15%) and appearance changes (no cracking or discoloration) are tested to ensure the tool kit can still function properly in extreme environments.
V. EVA Foaming Process Development Trends: More Environmentally Friendly, Smarter, and More Efficient
With stricter environmental regulations and the advancement of smart manufacturing, EVA foaming technology is evolving in three directions, bringing new performance breakthroughs to specialty tool kits:
(I) Environmentally Friendly: Halogen-Free Flame Retardant and Bio-Based Raw Materials
Traditional flame retardants (such as bromine-based ones) pose environmental risks. The industry is currently adopting halogen-free flame retardant systems (such as magnesium hydroxide and red phosphorus composite flame retardants). These systems meet the UL94 V-0 flame retardancy standard while achieving zero heavy metal release. A more cutting-edge approach is the development of bio-based EVA raw materials. By polymerizing plant-derived ethylene with vinyl acetate, they reduce dependence on petroleum resources. Tool kits made from these materials are naturally biodegradable and meet the environmental requirements of European and American markets.
(II) Intelligence: Digital Twins and Parameter Visualization
Smart manufacturing technology is infiltrating foam production. Digital twin technology is used to construct virtual foaming models, enabling pre-simulation of foaming effects under different formulations and parameters, reducing mold trials. Temperature, pressure, and displacement sensors are embedded in the mold to collect real-time data and upload it to a cloud platform, enabling AI algorithms to optimize process parameters. One company, after implementing this technology, reduced its scrap rate from 8% to 2% and increased production efficiency by 15%.
(III) Functionalization: Gradient Foaming and Composite Processing
To meet the need for “localized reinforcement” in tool kits, gradient foaming technology has emerged. By controlling the mold’s temperature in different zones, different microporous structures with varying densities are formed in different areas of the tool kit. High density (700 kg/m³) is applied to the slots to enhance support, while low density (300 kg/m³) is applied to the edges to enhance cushioning. Furthermore, the foaming and laminating processes are more closely integrated. For example, waterproof membranes and conductive fabrics can be directly bonded to the EVA during the foaming process, eliminating the need for secondary bonding. This improves performance and simplifies the process.
Conclusion
The quality differences in EVA specialty tool kits are essentially due to the subtle differences in the foaming process. From the precise ratio of raw materials to the optimal process selection and rigorous quality control during the production process, every step contributes to the final product’s protective performance and user experience.
Post time: Sep-22-2025