




How to Get a Prototype for Your Custom EVA Tool Case Design
Custom EVA tool cases deliver tailored protection for hand‑tools, measuring equipment, diagnostic gear and portable instruments. Before committing to large‑volume manufacturing, a physical prototype is your most critical checkpoint. It validates fit, material feel, ergonomics, branding and real‑world durability, helping you avoid costly mass‑production mistakes. Many procurement teams underestimate what goes into successful prototyping, leading to extended timelines, misaligned specs and repeated sample revisions. This guide walks buyers through the full workflow, key deliverables, evaluation criteria, typical timelines and common pitfalls to watch out for.
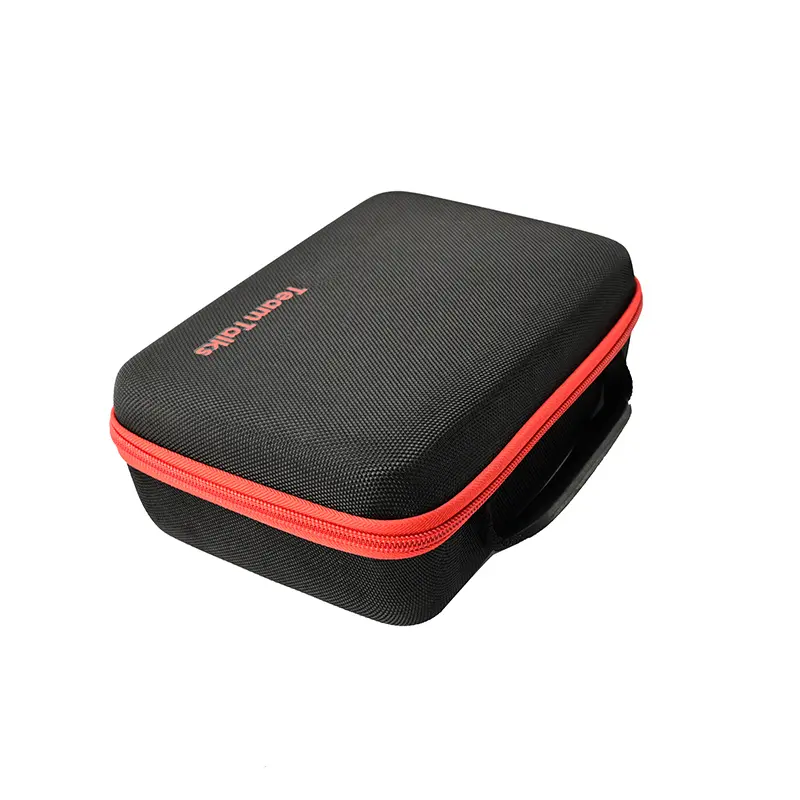
What Exactly Is an EVA Tool Case Prototype?
An EVA prototype (also referred to as pre‑production sample or first‑article sample) is a physical unit built to match your intended final product as closely as possible. It is not a rough mock‑up. A proper prototype includes the molded EVA outer shell, selected exterior fabric, fully contoured foam inserts, hardware such as zippers and handles, plus your branding treatments.
There are two common prototype variants you will encounter when working with manufacturers:
- Functional prototype: Focuses on fit, structure and mechanical performance. May use temporary logo finishes or alternate fabric options to cut lead‑time for quick validation of internal layout and shell geometry.
- PP (pre‑production) prototype: Built with all final‑production materials, hardware, colors and branding. This becomes your official reference standard for bulk manufacturing, inspection and third‑party quality checks.
A functional prototype works great for early‑stage layout testing. Always request a PP sample before signing off on mass production orders.
Step 1: Compile a Complete Project Brief Before Contacting Manufacturers
The quality of your prototype starts with the information you provide. Incomplete or vague requirements are the number‑one cause of back‑and‑forth emails, re‑samples and schedule slippage. Before reaching out to potential suppliers, assemble your full brief.
Include these key pieces of information:
- Item specifications for tools being housed
- Exact physical dimensions (measure physical hardware rather than relying purely on nominal CAD values; small tolerances can make foam inserts too tight or too loose)
- Weight of each tool or component
- Any protruding parts, switches, connectors or moving sections that need clearance inside the case
- List of all accessories that will also be stored (cables, chargers, bits, manuals)
- Case mechanical and performance expectations
- Outer case target dimensions and preferred shape (rounded corners or sharp square edges)
- Required protection level: shock‑absorption, drop‑test expectations, compression‑resistance for stacked shipping
- Environmental requirements: splash‑resistance, intended indoor or field‑outdoor use
- Shell hardness preference for EVA material
- Interior layout requirements
- Custom CNC‑milled foam cavities, pick‑and‑pluck foam or elastic divider style
- Mesh pockets, elastic straps or document compartments on the lid
- Whether tools should sit snug or have minor clearance for easy insertion and removal
- Exterior and hardware details
- Outer material: Oxford fabric, PU leather, carbon‑fiber texture or other laminate
- Zipper grade, color; waterproof or standard zipper
- Handle style: molded plastic grip, fabric carry handle, shoulder strap, carabiner loops
- Pantone color references for fabrics, zippers and trims
- Branding and compliance
- Vector‑format logo files, placement location, and application method: screen‑print, heat‑transfer, emboss or deboss
- Any material compliance requirements such as REACH or RoHS
- Project context
- Estimated target order quantity
- Desired prototype turnaround timeline
- Critical project milestones or deadlines
Buyer tip: If you do not have finished CAD drawings, sending actual physical tools to the manufacturer for measurement is often the most reliable way to achieve perfect‑fitting foam inserts.
Step 2: Review Digital Engineering Outputs Prior to Physical Prototype Build
Once your brief is submitted, experienced manufacturers will translate your requirements into digital deliverables before cutting any physical material. Do not skip this review stage; fixing geometry on screen costs far less than remaking physical samples.
Typical digital deliverables include:
- 2D technical drawings showing outer shell dimensions, hardware placement, seam lines and foam cavity layouts
- 3D photorealistic renderings of the finished tool case, showing colors, logo positioning and overall form
Use this phase to adjust compartment sizing, move handle or zipper placement, revise logo size or tweak foam layout. Confirm in writing that you approve the digital design, so the factory moves into physical prototype production with aligned expectations.
Step 3: Understand Prototype Build Methods and Expected Lead‑Times
Manufacturers use different prototyping techniques depending on your project stage and whether brand‑new tooling is needed for the outer shell.
- CNC rapid prototype (no new thermo‑mold) The outer shell is CNC‑machined rather than heat‑pressed from a production aluminum mold. This works well for early functional checks of fit and foam layout. Turnaround is generally 5‑8 working days. Note: surface finish may differ slightly from mass‑production molded shells.
- Sample‑mold / pre‑production mold prototype A dedicated sample‑level mold is used to thermo‑form the EVA shell, closely mimicking mass‑production output. Foam inserts are CNC milled, hardware and branding are applied. This yields a near‑production‑quality sample, typical lead‑time of 7‑12 working days for fully‑custom new designs.
- Production‑tool PP sample After final prototype approval, full‑scale production molds are machined. The first units off these production molds become your PP pre‑production samples. These are your golden reference samples for mass‑production quality control.
Important expectation setting: Prototyping is rarely one‑and‑done. Most custom projects require one or two rounds of revisions. Build 7‑10 days of buffer time for revisions into your overall project schedule.
Step 4: Receiving and Evaluating Your Physical Prototype
When you receive your prototype, resist only checking photos sent by the supplier. Physical hands‑on testing is essential. Work through this practical checklist for your review:
Fit and function
- Place all your actual tools and accessories inside. Do items sit securely without rattling? Can you remove and insert tools smoothly without jamming or scratching foam?
- Close and zip the case fully. Does it shut without forcing? Does internal content shift when you shake the closed case?
- Test all hardware: zippers should glide without catching; handles must feel sturdy for the full loaded weight of your kit.
Build quality and materials
- Compare fabric texture, hardness of shell, foam density against your specification brief. Look for surface blemishes, uneven stitching or glue overflow.
- Inspect branding: logo placement, sharpness of print or emboss, color match against your Pantone references.
Practical usability
- Carry the loaded case to assess ergonomics. Is the handle comfortable when full weight is applied?
- Check lid pockets and mesh sections: confirm they hold manuals, small cables without bulging that interferes with case closure.
Document every issue clearly with photos. Group feedback into categories: must‑fix critical changes, nice‑to‑have minor adjustments, items you accept as‑is. Send structured feedback back to the manufacturer for the revised iteration.
Step 5: Revisions, Final Sign‑Off and Transition Toward Mass‑Production
After you submit feedback, the factory will produce revised samples addressing your noted points.
When you are fully satisfied with the PP pre‑production prototype:
- Formally sign‑off on this sample. Keep one physical golden sample for your internal QC team, provide a reference copy to the manufacturer’s production floor and retain one for potential third‑party inspection purposes.
- Lock all technical specifications. After mass‑production tooling is completed, major structural changes will incur new tooling cost and extended lead‑time.
- Finalize commercial terms: MOQ, pricing, tool‑fee arrangements, production lead‑time, inspection standards and shipping arrangements.
Common Prototype Pitfalls Buyers Should Avoid
Many procurement teams run into predictable setbacks. Being aware helps you steer your project smoothly:
- Relying only on CAD nominal dimensions, not real‑world physical measurements CAD file dimensions do not always reflect finished tool hardware. Even a 1‑2 mm discrepancy can make foam inserts overly tight or loose. Whenever feasible send physical hardware to the factory for measurement.
- Skipping the PP sample and approving only a rapid CNC mock‑up for mass‑production CNC rapid prototypes have different surface and molding characteristics from thermo‑formed mass‑production shells. Always complete PP sample validation before large orders.
- Vague requirements for protection and testing If you need drop‑test or compression performance, write those requirements explicitly in your brief. Do not assume the manufacturer will infer your durability standards.
- Low‑resolution logo artwork Blurry logo files result in poor‑quality printing or embossing on your finished case. Always supply vector‑format artwork.
- Crunching timelines with zero revision buffer Almost all custom EVA projects require at least one round of prototype tweaks. Building buffer time prevents rushed decisions that lead to defective bulk inventory.
Frequently Asked Questions
How much does an EVA tool‑case prototype typically cost?
Prototype costs cover engineering labor, material consumption, machining and shipping. Costs vary with case size, complexity of custom foam inserts and whether new sample‑molds are required. Many suppliers apply prototype fees against subsequent bulk‑order value upon placement of your production purchase order. Always clarify tooling and sample‑fee policy in advance.
How many prototype revision rounds should I expect?
For most custom projects, 1‑2 rounds of revisions are normal. If your initial brief is very comprehensive, you may achieve approval on the first sample. Major redesigns will add additional rounds and extend timelines.
Can I change foam layout after prototype sign‑off?
Minor foam cavity adjustments can sometimes be completed via re‑CNC work. Major outer‑shell shape changes require brand‑new mold tooling, with additional cost and lead‑time. Best practice is locking all layout decisions at the PP prototype stage.
Final Thoughts
Your custom EVA tool‑case prototype acts as the critical bridge between conceptual design and real‑world finished product. Investing sufficient effort in creating a thorough brief, reviewing digital designs, hands‑on physical sample evaluation and controlled revision rounds drastically reduces the risk of receiving bulk goods that fail fit, durability or branding expectations.
Treat prototyping not as a simple box‑ticking step, but as your primary opportunity to validate every detail before committing to full manufacturing. Once your PP prototype is formally signed off, you can move into mass‑production with confidence that the final tool cases will match your functional and brand requirements.
Post time: Aug-26-2026